

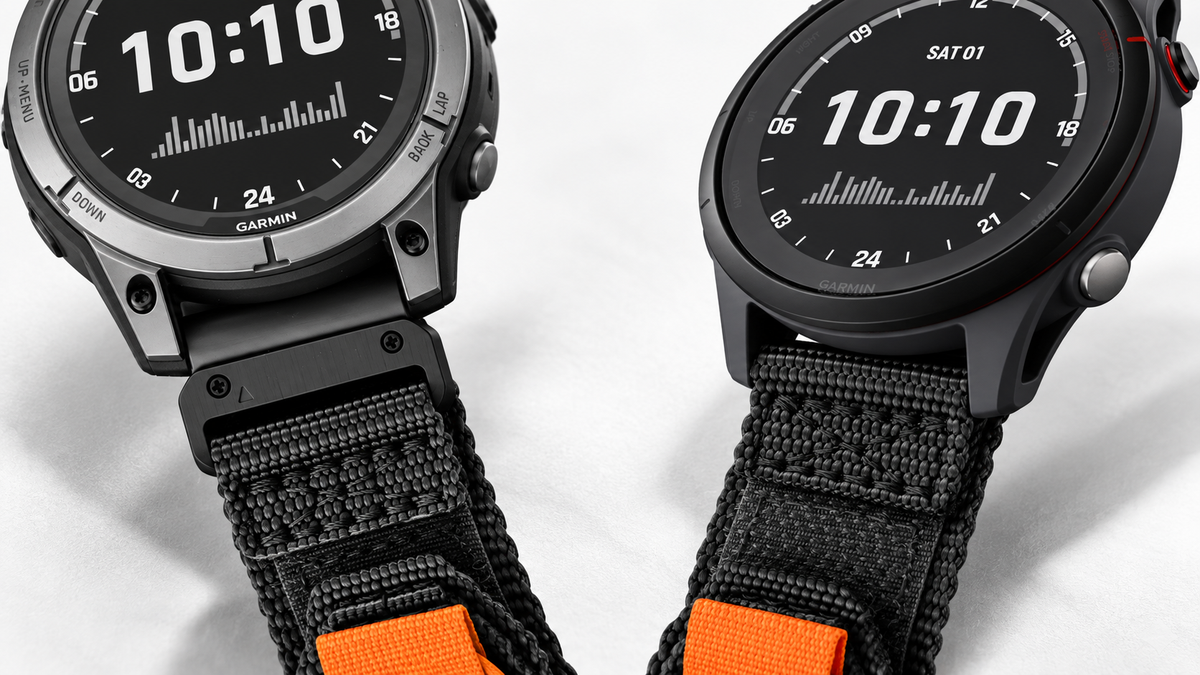
Garmin QuickFit and standard quick-release bands use different attachment mechanisms. Two bands marked 22mm are not automatically interchangeable. Start with your exact watch model and case version, identify the connection, then check band width and wrist fit.
For most buyers, the choice is determined by the watch they already own. Once compatibility is settled, you can choose the material, closure and adjustment range that suit your routine.
Contents
- QuickFit vs Quick Release at a Glance
- How to Identify Your Garmin Band Connection
- Why Matching the Width Is Not Enough
- Garmin Model and Band-Width Examples
- Can QuickFit and Quick Release Bands Be Swapped?
- Choosing a Bandletic Replacement Band
- Installation and Final Fit Checks
- Garmin Band Connection FAQs
QuickFit vs Quick Release at a Glance
The practical difference in Garmin QuickFit vs quick release is what you operate when removing the band.
| What to check | Garmin QuickFit | Standard quick release |
|---|---|---|
| Attachment | A latch on the band closes around the watch pin | A spring bar seats between the watch lugs |
| Operating part | Release latch on the connector | Small sliding lever on the spring bar |
| Removal | Slide the latch and lift the band off the pin | Slide the lever to retract one end of the spring bar |
| Installation | Align the connector and press it onto the pin | Seat one spring-bar end, retract the other and align it with the opposite lug |
| Purchase checks | Exact model, QuickFit width and product compatibility | Exact model, quick-release width and product compatibility |
Garmin documents these actions in its fēnix 8 QuickFit instructions and Venu 4 band instructions.

QuickFit: the central latch closes around the watch pin. The arrows show alignment for installation.

Standard quick release: the arrow identifies the spring-bar lever.
These mechanisms make compatible band changes convenient. Their names do not establish a durability rating or show that one will withstand more force than the other.
How to Identify Your Garmin Band Connection
Turn the watch over and inspect the point where the strap meets the case. The wrist closure—a buckle, magnet or hook-and-loop fastener—is a separate part.
Look for a sliding lever on the spring bar for standard quick release, or a release latch built into the band connector for QuickFit. On a typical QuickFit change, the watch pin stays in place while the band detaches.
Then open the owner's manual for your full model name and find “Changing the Bands” or “Changing the QuickFit Bands.” Record the specified connection and width. Include suffixes and case sizes, such as 265 versus 265S or Venu 4 41mm versus 45mm.
If a replacement strap has obscured the mechanism, or the seller only calls it “quick change,” pause the purchase. Ask for a clear underside photograph and confirmation for your exact watch.
Why Matching the Width Is Not Enough
Width describes a dimension; it does not identify the attachment mechanism. A Garmin 22mm quick-release band and a 22mm QuickFit band can share the same width label while connecting differently.
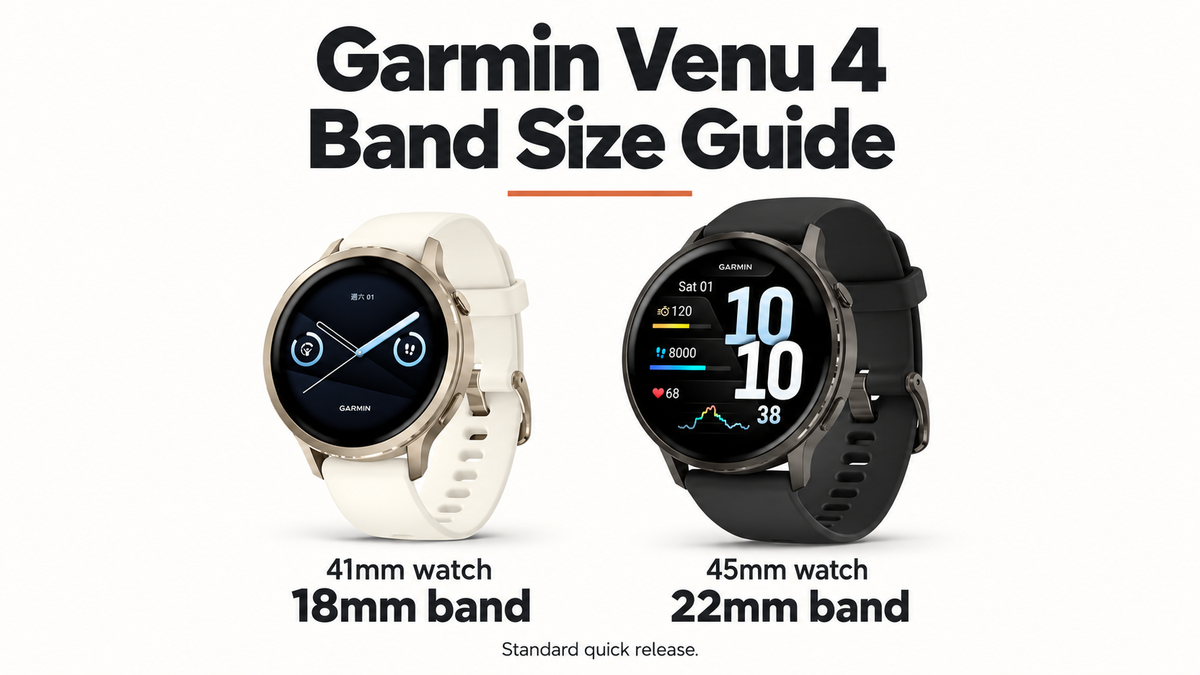
Case size also matters. Garmin specifies 18mm standard quick release for Venu 4 41mm and 22mm standard quick release for Venu 4 45mm. Neither uses a 41mm or 45mm strap: those numbers describe the watch case.
Forerunner 570 provides another example: the 42mm version uses 20mm standard quick release, while the 47mm version uses 22mm. “Fits Forerunner” is therefore too broad to settle a purchase.
Check compatibility in this order: full model and case version → connection → band width → product listing → wrist range. A matching width is one checkpoint, not the complete answer.
Garmin Model and Band-Width Examples
The examples below separate Garmin's specifications from Bandletic's current Pack product listings. “Listed” means the product page names that model; it does not describe a new installation test.
Official sources and Pack listings checked October 13, 2026. This is a selection of models, not a complete compatibility list.
| Exact watch version | Garmin connection and width |
|---|---|
| fēnix 8 AMOLED, 47mm | QuickFit 22mm |
| fēnix 8 AMOLED, 51mm | QuickFit 26mm |
| Forerunner 265, not 265S | Standard quick release, 22mm |
| Forerunner 570, 42mm | Standard quick release, 20mm |
| Forerunner 570, 47mm | Standard quick release, 22mm |
| Venu 4, 41mm | Standard quick release, 18mm |
| Venu 4, 45mm | Standard quick release, 22mm |
| Vivoactive 6 | Standard quick release, 20mm |
For fēnix 8, the manual supplies the installation procedure and Garmin's model-specific product specifications supply the widths. Do not extend these rows to every fēnix or Forerunner model.
Can QuickFit and Quick Release Bands Be Swapped?
Do not assume a direct swap. A QuickFit latch needs a compatible watch pin and connector clearance. A standard quick-release band needs its spring bar to seat correctly in the watch lugs. Equal width does not establish either fit.
Garmin does document alternatives for some models. The Forerunner 745 manual, for example, includes a procedure for compatible QuickFit 22 bands. That model-specific option does not prove compatibility for a Venu 4 or Forerunner 570.
For a routine replacement, follow your watch's documented connection and the band's compatibility listing. Avoid forcing a connector, bending a spring bar or modifying watch hardware to make a purchase fit.
Choosing a Bandletic Replacement Band
Start with the Bandletic Garmin band collection, then open the individual product specification. A collection's width filter helps narrow the options; the product still needs to match your watch.
For a listed QuickFit watch
The Pack Outdoor Band QuickFit offers 22mm and 26mm connections. Its current list names fēnix 8 47mm and 51mm respectively. Select the correct width before choosing wrist size.

Pack QuickFit product detail. The operating latch is on the underside and is not visible in this image.
For a listed standard quick-release watch
The Pack Outdoor Band Quick Release offers 20mm and 22mm connections. Forerunner 265 appears in its 22mm list.

Pack Quick Release product detail. Check the underside for the spring-bar lever when identifying the connection.
Do not choose this 20/22mm Pack for Venu 4 41mm, which requires 18mm. Venu 4 45mm has a matching nominal width, but the current product list does not name it. Confirm that model before ordering; do the same for Forerunner 570 and Vivoactive 6.
Check the selected variant's wrist range
| Current Pack option | M wrist range | L wrist range |
|---|---|---|
| QuickFit 22mm | 165–180mm | 180–200mm |
| QuickFit 26mm | 175–190mm | 185–200mm |
| Quick Release 20mm or 22mm | 165–180mm | 180–200mm |
These are the selectors' millimeter ranges as checked above. Measure your wrist and recheck the selected variant. Band width does not describe wrist circumference.
Once model and connection match, browse the relevant 20mm, 22mm or 26mm options. Within those compatible choices, our nylon vs silicone comparison explains comfort, moisture and care.
Installation and Final Fit Checks
Follow the instructions for your watch and replacement band over a stable surface.
- QuickFit: release the latch to remove the old band, align the new connector and press it into place. Check that the latch has closed around the watch pin.
- Standard quick release: retract the spring bar to remove the old band. Seat one end of the new bar, retract the other and guide it into the opposite lug hole. Release the lever and check both ends are seated.
Check both sides, then gently pull each band end to confirm it stays attached. If the connector lifts away, the lever does not return or the band cannot move normally, remove it and recheck compatibility. Stop using damaged attachment parts.
Finally, adjust the wrist closure for a comfortable fit. Secure attachment to the watch and comfortable adjustment around your wrist are separate checks.
Garmin Band Connection FAQs
1. Is QuickFit the same as an ordinary quick-release band?
No. Garmin QuickFit uses a band-side latch around a compatible watch pin. Standard quick release operates a spring bar with a small sliding lever. A seller's general “quick-change” description does not identify which one you need.
2. Why can't I buy any band with the same width?
The width alone does not confirm the connector, pin fit or clearance around the case. Check the full model, connection and product compatibility before choosing wrist size.
3. Which connection is stronger or safer?
This guide does not establish a strength ranking. Installation convenience is not a load test. Use a compatible band, confirm that it is seated and inspect attachment parts for damage.
4. What if my Garmin model is missing from the product list?
Check the official manual, then ask Bandletic to confirm the exact model and case version. Include a clear photograph of the underside connection. Wait for confirmation before ordering on width alone.

Share:
Nylon vs Silicone Watch Band: Which Should You Choose?
Best Apple Watch Band for Running: Fit, Sweat & Security